
Google was also another really useful website. It was a good tool for my research because it allowed me to search for websites that helped gain useful information and also find images I needed, such as film posters. I used Google a lot because it was easy and quick to use in order to find all the information I needed for my research.
Wikipedia was also a very useful tool. It has a lot of information on it which was really good for my research. I found most of my information on hear, such as research in to American film classifications, film distribution company, inspirational practitioners, YouTube, genres and films. I used this by copy and pasting extracts in to my blog and highlighting important parts which I could look back over easily and also learn from this information which was useful for my further development. However, there is chance that the information of Wikipedia isn't true as anyone can change it, so I did have to check to make sure I was gaining valid information. It is also sometimes a lot of information to read, so I had to read through and pick out the parts I felt were important.

I also found IMDB very useful. It had a lot of information on films which was very useful for my research in to genre specific films, such as the plot summary, screen shots, directors and so on. I felt that all the information on this website was valid so it was a very useful and trust worthy source. It also had some useful articles such as the best found footage style films which was really useful when choosing some to research in to.

YouTube was extremely helpful towards my research. From this I could look in to teaser trailers to analyse easily and quickly which was a very useful tool. I then used a video converter which I will talk about later to convert these in to AVI files to upload to my blog. YouTube was also very useful when I was researching in to movie soundtracks. I got videos that people had uploaded of the soundtracks and then converted them to the videos you will see on my blog which I will explain later.

Outlook was really useful for keeping in contact with my actors. It allowed me to organise dates and email them scripts which was very useful. I also used it at college to email work to my Hotmail account which I could then continue at home. Outlook web mail was also useful as it meant I could use this email at home as I don't have outlook set up on my laptop.
I also used Hotmail to email work to myself, as I mentioned before. This was really useful and easy way to transfer and also back-up any work as I could access it from any computer anywhere as Hotmail is on-line. I also used Hotmail to keep in contact with my actors in the same way I used Outlook.

MSN also allowed me to easily keep in contact with my actors as well as send them files and even my final teaser trailer, poster and magazine to see how they turned out. It was a useful programme and was easier to talk on than email, but sending files was very slow but this was probably because they were so large.

Both my actors had Blackberrys so it was easy for me to keep in ontact with them via BBM. It was just another useful technology that helped me organise my filming and photo shoots. I also called them and sometimes used texts when BBM wasn't working, which was also useful.

Facebook was another website that was mostly used for keeping in contact with my actors. I could use Facebook chat and mail as an extra tool for organising dates but I couldn't send files on here so it wasn't particularly vital, just a back-up way of contacting them.
My actors also had twitter which meant I could message them and also tweet them to get in contact if I needed to. It was a good way to keep them updated, but again not as vital as a tool like email.

Soungle was really useful when finding sounds for my teaser trailer. It was extremely simple to use because I just had to type in the sound I wanted and the results would come up. They had a wide range of sounds but I also used other websites to get all the sounds I wanted.

Free sound was another really useful website for getting copyright free sound effects. The search bar tool was very useful as I was able to easily search sounds and the results would come up ready for me to listen to and download. I did have to create a login in order to download these sounds, but this wasn't a problem as it didn't charge me and was quick and easy.

Free SFX was quite similar to Free Sound in the way you had to sign up and also the design of the website. It was another very useful website for downloading sounds and it had a vast selection. The search bar tool made it very easy to find the sounds I wanted. I had to sign up but this wasn't a problem as it was free and quick.

A very useful piece of technology was Freemake Video Converter. It's available to download free online and made everything quick and easy to convert. Here is a print screen of what the programme looks like:

I also used this simple programme for when I just wanted to create a quick video that didn't need a lot of editing like my teaser trailer and directors commentary. Windows Live Movie Maker is simple and easy to use, so I used it to create my audience feedback stop frame animations. All I had to do was upload the photos and then speed it up to look like it was animated. This was easy to do but it did sometimes crash and the preview player was very slow so I couldn't see how my video turned out until I saved it. I also created my "making fake blood" video on here. I just uploaded the video and sped it up so it was quick to watch. This was very easy but again, it did crash and was very slow.
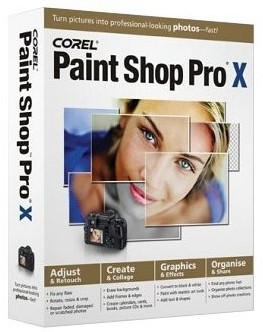
I used paint shop pro for the creation of my poster and and magazine cover. I really like this programme as it is similar to Photoshop but simpler, although it doesn't have as many advanced features. However it does allow me to do a lot and make a professional product. I used this programme to firstly edit my photos how I wanted them which made them look exactly how I ha mentioned. I really liked the burn tool because it allowed me to create a very dark background, appealing to the horror genre and creating more mystery. It was fairly easy to add text and easy to resize it, but once I saved the image as a JPEG it went slightly fuzzy, so perhaps I should have added the text on a different programme. One particular tool I really liked was the paint brush tool. I created a custom brush for my logos and rating, as you will see in my creation of final versions. This meant I could place them wherever I wanted with no background and any colour I wanted which was really useful. I also used the paintbrush tool to add the clip board to the masthead and the film to the red flash. I feel this was a really nice added feature to my magazine cover. I like this programme but it did sometimes crash which meant I lost my work, which was frustrating. To avoid this I kept saving my work every time I did something which made everything easier if it were to crash.

Publisher was a useful tool for creating things for my research and planning. I used publisher to create a mood board to display my results from my target market questionnaire which I then moved in to paint to save as a JPEG, I will explain this later. It was also very useful for creating charts and mind maps which I also print screened and saved as JPEG's in paint. Publisher is very easy to use and allowed me to display my results and planning very easily.

I used word mostly to create tables such as my location recce, shot list, contact list and so on. It was very useful for these things and allowed me to easily create tables for my planning. I then print screened these and put them in to paint which I will explain later.
Excel was very useful for my planning and research results. I firstly used it to create pie charts to display my results from my target market questionnaire. It was very easy to enter information and make a pie chart out of it. I could also change the colours of the pie chart easily so they fit in with the colour scheme of my blog. I then copied these pie charts in to paint and saved them as a JPEG which I will explain next. I also used excel to create my gant chart and production schedule. It was easy to do this on this programme, but was very time consuming. I feel that this was the best programme to use for this.
As I mentioned before, I used paint to make things such as charts in to JPEGs. I print screened these charts or mood boards etc. that I had created on word, publisher and excel. I then cropped then down to the size I wanted and saved them as a JPEG so I could upload the images to my blog. It was also useful for putting circles around parts on my prints screens that I wanted people to notice. I also used paint to paste my print screens of making my poster and magazine cover so I could save them as JPEGs to upload to my blog. Paint is a very simple but also useful programme that I feel I made good use of in my work.


Because the flip video camera wasn't good enough quality, I used my Panasonic HD video camera to film my final version. This was much better quality and I'm glad I re-filmed it with this technology. I avoided using this before because I thought the flip video camera was much easier to use and would be good enough quality. However this was still really easy to use and still just as easy to upload the videos as I could just put the memory card in to my laptop. I really like this camera and I feel it really improved my filming.

I used my compact Lumix camera for when I just wanted quick snapshots. I used it to take pictures of my location, costumes, behind the scenes and camera set up. This camera is easy to use and good quality so it was really good for what I used it for. I didn't want to use my Canon SLR, which I will talk about next, because I felt I didn't really need to for quick snap shots. I also used the video feature on this camera to film my "making fake blood" video which was also very easy to use.

This is the camera I used for my photos for my magazine cover and poster. It gives really high quality photographs and I think it was a suitable camera for this task. I got some really good shots with it and it was also easy for me to use. However I did have some difficulties getting the settings right when taking the photos in such a dark location. I also used this camera to take photos for my stop motion and I also ended up with some good quality photos for my audience feedback.


The last bit of equipment I used was a tripod. I used this for the first shot in my teaser trailer. I set up the video camera on the tripod, but it took me a while to get this right. However once I had worked it out it was easy to use. I'm glad I used the tripod for a still shot in my teaser trailer as it created a variety of shots and also made it look professional. In also used the tripod to film my "making fake blood" video and to photograph my stop motion animation displaying my audience feedback results. This allowed me to keep the camera still and was very useful. The photos above show how I set the tripod up.
I also found IMDB very useful. It had a lot of information on films which was very useful for my research in to genre specific films, such as the plot summary, screen shots, directors and so on. I felt that all the information on this website was valid so it was a very useful and trust worthy source. It also had some useful articles such as the best found footage style films which was really useful when choosing some to research in to.
YouTube was extremely helpful towards my research. From this I could look in to teaser trailers to analyse easily and quickly which was a very useful tool. I then used a video converter which I will talk about later to convert these in to AVI files to upload to my blog. YouTube was also very useful when I was researching in to movie soundtracks. I got videos that people had uploaded of the soundtracks and then converted them to the videos you will see on my blog which I will explain later.
Outlook was really useful for keeping in contact with my actors. It allowed me to organise dates and email them scripts which was very useful. I also used it at college to email work to my Hotmail account which I could then continue at home. Outlook web mail was also useful as it meant I could use this email at home as I don't have outlook set up on my laptop.
I also used Hotmail to email work to myself, as I mentioned before. This was really useful and easy way to transfer and also back-up any work as I could access it from any computer anywhere as Hotmail is on-line. I also used Hotmail to keep in contact with my actors in the same way I used Outlook.
MSN also allowed me to easily keep in contact with my actors as well as send them files and even my final teaser trailer, poster and magazine to see how they turned out. It was a useful programme and was easier to talk on than email, but sending files was very slow but this was probably because they were so large.
Both my actors had Blackberrys so it was easy for me to keep in ontact with them via BBM. It was just another useful technology that helped me organise my filming and photo shoots. I also called them and sometimes used texts when BBM wasn't working, which was also useful.
Facebook was another website that was mostly used for keeping in contact with my actors. I could use Facebook chat and mail as an extra tool for organising dates but I couldn't send files on here so it wasn't particularly vital, just a back-up way of contacting them.
My actors also had twitter which meant I could message them and also tweet them to get in contact if I needed to. It was a good way to keep them updated, but again not as vital as a tool like email.
Soungle was really useful when finding sounds for my teaser trailer. It was extremely simple to use because I just had to type in the sound I wanted and the results would come up. They had a wide range of sounds but I also used other websites to get all the sounds I wanted.
Free sound was another really useful website for getting copyright free sound effects. The search bar tool was very useful as I was able to easily search sounds and the results would come up ready for me to listen to and download. I did have to create a login in order to download these sounds, but this wasn't a problem as it didn't charge me and was quick and easy.
Free SFX was quite similar to Free Sound in the way you had to sign up and also the design of the website. It was another very useful website for downloading sounds and it had a vast selection. The search bar tool made it very easy to find the sounds I wanted. I had to sign up but this wasn't a problem as it was free and quick.
A very useful piece of technology was Freemake Video Converter. It's available to download free online and made everything quick and easy to convert. Here is a print screen of what the programme looks like:

The technology is very easy to use. You can upload your own video, DVD, sound or photo and then click on the large list of options as the bottom to convert it to any file you want. It's very quick and easy and was a useful tool. This programme also has a certain feature which was extremely useful to me. If you copy a URL of a webpage with a video on it and then click on "past URL", it automatically places the video in the programme ready to convert. This made it very easy to convert videos off YouTube in to AVI files which I could then upload to my blog to illustrate my analysis and research. I also used this feature when researching in to soundtracks. I took videos on YouTube where the soundtrack had been uploaded, converted them to MP3 files and then converted them back to AVI files so I could upload them to by blog. This was not only easy, but it also put in a visualizer when I made it in to a video, which was a very nice feature. I really like this programme and would definitely use it again.
I used Final Cut to create my teaser trailer draft and final version as well as my directors commentary for my evaluation. I really like this programme because of the wide range of things you can do to a video to make it professional and exactly how you want it. The feature I really liked was how you could edit the look of the video like you would edit a photograph, for example I was able to change the colours to make the video look like night vision which was a very good and useful feature. I also really like the wide range of video filters, such as the Bad TV effect which I feel I made really good use of and worked well for my teaser trailer. The programme is very easy to use once I had learnt to use the technology and I will definitely use this programme again.
I also used this simple programme for when I just wanted to create a quick video that didn't need a lot of editing like my teaser trailer and directors commentary. Windows Live Movie Maker is simple and easy to use, so I used it to create my audience feedback stop frame animations. All I had to do was upload the photos and then speed it up to look like it was animated. This was easy to do but it did sometimes crash and the preview player was very slow so I couldn't see how my video turned out until I saved it. I also created my "making fake blood" video on here. I just uploaded the video and sped it up so it was quick to watch. This was very easy but again, it did crash and was very slow.
I used paint shop pro for the creation of my poster and and magazine cover. I really like this programme as it is similar to Photoshop but simpler, although it doesn't have as many advanced features. However it does allow me to do a lot and make a professional product. I used this programme to firstly edit my photos how I wanted them which made them look exactly how I ha mentioned. I really liked the burn tool because it allowed me to create a very dark background, appealing to the horror genre and creating more mystery. It was fairly easy to add text and easy to resize it, but once I saved the image as a JPEG it went slightly fuzzy, so perhaps I should have added the text on a different programme. One particular tool I really liked was the paint brush tool. I created a custom brush for my logos and rating, as you will see in my creation of final versions. This meant I could place them wherever I wanted with no background and any colour I wanted which was really useful. I also used the paintbrush tool to add the clip board to the masthead and the film to the red flash. I feel this was a really nice added feature to my magazine cover. I like this programme but it did sometimes crash which meant I lost my work, which was frustrating. To avoid this I kept saving my work every time I did something which made everything easier if it were to crash.
Publisher was a useful tool for creating things for my research and planning. I used publisher to create a mood board to display my results from my target market questionnaire which I then moved in to paint to save as a JPEG, I will explain this later. It was also very useful for creating charts and mind maps which I also print screened and saved as JPEG's in paint. Publisher is very easy to use and allowed me to display my results and planning very easily.
I used word mostly to create tables such as my location recce, shot list, contact list and so on. It was very useful for these things and allowed me to easily create tables for my planning. I then print screened these and put them in to paint which I will explain later.
Excel was very useful for my planning and research results. I firstly used it to create pie charts to display my results from my target market questionnaire. It was very easy to enter information and make a pie chart out of it. I could also change the colours of the pie chart easily so they fit in with the colour scheme of my blog. I then copied these pie charts in to paint and saved them as a JPEG which I will explain next. I also used excel to create my gant chart and production schedule. It was easy to do this on this programme, but was very time consuming. I feel that this was the best programme to use for this.
As I mentioned before, I used paint to make things such as charts in to JPEGs. I print screened these charts or mood boards etc. that I had created on word, publisher and excel. I then cropped then down to the size I wanted and saved them as a JPEG so I could upload the images to my blog. It was also useful for putting circles around parts on my prints screens that I wanted people to notice. I also used paint to paste my print screens of making my poster and magazine cover so I could save them as JPEGs to upload to my blog. Paint is a very simple but also useful programme that I feel I made good use of in my work.

I used my Sandisk memory stick to save any work I have done and transfer it between college and home. This was really useful as it didn't limit me from doing work when I needed to. It also allowed me to transfer my teaser trailer from my mac to my PC. My memory stick also acted as something to back up my files on so I had other copies instead something went wrong.
I used this Flip video camera to film my draft teaser trailer. I thought it would be good enough quality, but unfortunately it wasn't. However this was very easy to use and was easy to carry around. I also really liked the feature of the flip out usb connection which mean I could easily download my videos on to my PC and my Mac for editing.
Because the flip video camera wasn't good enough quality, I used my Panasonic HD video camera to film my final version. This was much better quality and I'm glad I re-filmed it with this technology. I avoided using this before because I thought the flip video camera was much easier to use and would be good enough quality. However this was still really easy to use and still just as easy to upload the videos as I could just put the memory card in to my laptop. I really like this camera and I feel it really improved my filming.
I used my compact Lumix camera for when I just wanted quick snapshots. I used it to take pictures of my location, costumes, behind the scenes and camera set up. This camera is easy to use and good quality so it was really good for what I used it for. I didn't want to use my Canon SLR, which I will talk about next, because I felt I didn't really need to for quick snap shots. I also used the video feature on this camera to film my "making fake blood" video which was also very easy to use.
This is the camera I used for my photos for my magazine cover and poster. It gives really high quality photographs and I think it was a suitable camera for this task. I got some really good shots with it and it was also easy for me to use. However I did have some difficulties getting the settings right when taking the photos in such a dark location. I also used this camera to take photos for my stop motion and I also ended up with some good quality photos for my audience feedback.


The last bit of equipment I used was a tripod. I used this for the first shot in my teaser trailer. I set up the video camera on the tripod, but it took me a while to get this right. However once I had worked it out it was easy to use. I'm glad I used the tripod for a still shot in my teaser trailer as it created a variety of shots and also made it look professional. In also used the tripod to film my "making fake blood" video and to photograph my stop motion animation displaying my audience feedback results. This allowed me to keep the camera still and was very useful. The photos above show how I set the tripod up.
No comments:
Post a Comment